Graphics VS. Design, and what I learned from video games

24 01 2011

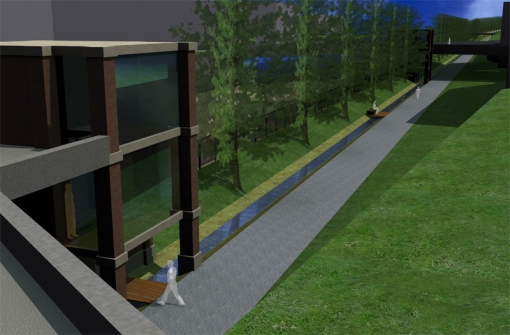
A few weeks ago I posted a blog asking for critiques on some 3D models components I had made.  I posted it on IGN, WordPress, and Land8Lounge.  The response was fairly low, and I tried posting it as a discussion thread on Land8Lounge as well.  This got some helpful comments, but it also possibly inspired a thread that brought up the issue of rendering VS. design in Landscape Architecture.  This question came up a few weeks ago at a networking event for NYC landscape architects, and I talked to a few different people about it.  It made me wonder: Why is it that designers often have a negative reaction to “high end” renderings?

If I said I had never seen a rendering and assumed that the graphic quality was hiding something I would be lying.  I think this often comes from past experience, either in firms as CAD monkeys, or in school.  We, I think, have all had a presentation where we worked our ass off to the last minute perfecting a design, leaving little time to get perfect graphics, so we go out with what we can, trusting our peers and other trained professionals to see through the pencils lines to the heart of the design beneath, only to be disappointed.  We have also all had the time when we have seen the person slap together a half-assed design, but with pretty pictures, and when we are counting on our bosses and teachers to see it, they instead get “blinded” by the crisp lines, hypnotized by the texture work, and in a trance from the shadow quality.  I think it’s this shared experience that leads so many of us to distrust pretty drawings: we all know just how easy it is to lie with graphics.  Whether it is drawing a plan that doesn’t show steps because they client didn’t want them – even though it’s not physically possible, screwing with perspective sizes, or hiding views that you don’t want noticed.  We know the tricks all too well; in part because we use them to some extent ourselves.

We choose a rendering style based on what we want to show and not show: Computer graphics traditionally show a Utopian version of everything – where it all looks fresh from vacuum -packaging, but it makes the space look more contemporary to clients; Hand graphics hide views by simply not drawing the far background, but show more flow and life in the space.  We choose views that may not show the space in the best ways, but show a feature we want to emphasize over others.  It’s a limit of non-physical models – you have a finite window onto the world, you are going to be careful about what you choose to show to show off what you want to be seen.  The problem is, we need a way to easily communicate to clients, and in forms other than physical models, and clients who have not been trained as designers get the best feel for a space through perspective drawings.

-Utopia?

So the issue becomes not graphics VS design, because it never really was outside of designers’ heads.  The issue is how can we make graphics that communicate effectively, and manage to not fire off alarm bells in designer’s and client’s brains.

Personally, I choose to concentrate on computer graphics over hand graphics not due to a lack of skill (believe me, if I put the time into drawing that I have put into rendering I’d be pretty good with a pencil), but because in my mind, it is the most honest form of representation.  If I model everything the way it is – which I can with no extra effort – I know exactly what I will see from a given view.  I can put a camera inside your eyes when you are sitting on a bench, and if you would actually see a sliver of that utility box, it’s going to be in the rendering.  The problem is, it would still set off alarm bells, all because of an effect that is becoming well-known in the media worlds of movies and video games.

The “Uncanny Valley” is an issue that became most well-known a few years ago when the movie “The Polar Express” came out.

The Uncanny Valley

It’s the theory that as things become more realistic, they become more familiar, but only to a certain point.  Once things become TOO realistic, small things that are wrong make us cringe and react negatively.  In “The Polar Express” the thing that set people off was the eyes.  For all the realism the characters had, from mannerisms created by directly copying from actors in Motion Capture suits, to careful texture work, the fact that the eyes didn’t glisten correctly gave them a dead look, and made some people instantly see, instead of a heartwarming children’s story, a movie about a train filled with zombies… (note to self – Make a movie about a train full of zombies.  “Brains on the Orient Express”?)

IGN.com

In the ensuing years movies, and video games, have dealt with this issue in one of two ways.  Some have gone the route of making themselves, while beautiful, purposefully unrealistic.  This brings thoughts of movies such as “Up”, and games such as “Little Big Planet 2”.  Neither of these tries to be realistic – the characters look like cartoons, but with realistic flesh-tones (or woven sack-tones in the case of Little Big Planet), elements.

Little Big Planet

The other method is to continue to push the boundaries of realism.  Movies like Avatar skirt this method by having realistic aliens that we have no internal reference for as digital characters.  Where true realism is pushed the hardest today is in gaming.  Games like Uncharted 2, Heavy Rain, and Read Dead Redemption push realism in gaming past where it has been before.  As some of the best looking games widely available, they all have one thing in common.

Grime.

Uncharted 3

None of these games are set in pristine areas.  They all are set in places that have been lived in, that have wear and tear, grease and grime, chips and gashes.  I think this is one of the essential things to making a convincing 3D rendering, and one that doesn’t make you think you are being tricked by graphics.  The splinters out of the wood crate, the dirt on the boots, the powder burns on the pistol, all give it a realistic feel.

Red Dead Redemption

If that detail is paired with a render engine that has more than 1/30th of a second to output, it would give amazing results.

And those are the kind of results that I think we, as designers/graphic artists have to work for.  Gone are the days of the pristine landscape with rows of identical, perfectly pruned trees.  If we want buy-in from clients, and from other designers, we need to show all the blemishes on the face of our designs.  Whether it’s the ugly light industrial building that is visible through the trees, or the mottled color in the bricks, these are some of the things that A) will affect the spirit of place and B) that will create a sense of life in our renderings.

Are hand graphics still valid? Of COURSE they are.  Neither hand graphics nor computer graphics is inherently “better”.  They are just different.  The grime and dirt of the world in computer graphics is no different then adding a little of every color to a tree in a Mike Lin style render.

BeLoose.com

It adds a little depth, and a spark of randomness that is what makes the world what it is.

Uncanny Vally image from http://ntlkdesign.co.uk/blog/

Little Big Planet 2 image from littlebigplanet.com

Mik Lin image from Beloose.com

All other images from IGN.com


An Advanced Course in PC Hardware: Choosing Components

8 01 2011

The first step in picking what components you want in your computer, whether you are building a custom setup, or buying one off the shelf, is looking at what software you expect to use.  I was looking for a rig that would work for Photoshop, AutoCAD, SketchUp, Thea Render (3D-Rendering Engine), and of course, games from time to time.  The next thing is to figure out what each one of these software packages rely on most heavily- Processor, RAM, or Graphics Card:

Photoshop: Here are the system requirements:

  • Intel® Pentium® 4 or AMD Athlon® 64 processor
  • 1GB of RAM
  • 1024×768 display (1280×800 recommended) with qualified hardware-accelerated OpenGL graphics card, 16-bit color, and 256MB of VRAM

The newer Photoshop versions make use of graphics cards more and more, but in bigger file sizes they also rely heavily on Processor and RAM.  The amount of layers, filters, and file sizes you normally work with will determine how much of either of these you need.  As I am looking to do plan graphics, printable high quality at 36″ x 48″, with many (40+) layers, I, in short, need a LOT of both RAM and Processor.

AutoCAD: The stated system requirements for 64-bit AutoCAD11 (2D) are:

  • AMD Athlon 64 with SSE2 technology, AMD Opteron® processor with SSE2 technology, Intel® Xeon® processor with Intel EM64T support and SSE2 technology, or Intel Pentium 4 with Intel EM64T support and SSE2 technology
  • 2 GB RAM
  • 2 GB free space for installation
  • 1,280 x 1,024 true color video display adapter 128 MB or greater, Microsoft® Direct3D®-capable workstation-class graphics card

First, you can run a PC at either 32-bit or 64-bit, 32-bit can only see up to 4 Gb of RAM.  Generally if you are building a new system you will go with 64-bit to increase the amount of RAM you can use now, or could upgrade to in the future.  None of these are amazing stats, but the RAM is slightly more powerful than the rest of the system- if all the components were equally important I would expect to see a Pentium 4 paired with 1 Gig of RAM and a 256 MB Graphics Card, or a P4 3.0 GHz (processor speed)/Dual Core Pentium 2.0GHz, 2 Gig RAM, 256 Meg Graphics Card.  This basically tells me that for 2D CAD the RAM is a bit more important than the Processor (which comes more into play with CAD’s modeling tools), and that while you need a Graphics Card, it does not need to be a great one by any means.

SketchUp: Recommended resources:

  • 2+ GHz processor.
  • 2+ GB RAM.
  • 3D class Video Card with 512+ MB of memory or higher. Please ensure that the video card driver supports OpenGL version 1.5 or higher and up to date.
    *SketchUp’s performance relies heavily the graphics card driver and it’s ability to support OpenGL 1.5 or higher. Historically, people have seen problems with Intel based cards with SketchUp. We don’t recommend using these graphics cards with SketchUp at this time.

While Processor and Graphics card are needed, RAM is the biggest limiting factor, in my experience, when you have large scale and or detailed models.

Thea Render: I could not find any system requirements, likely because the program is still in beta (testing phase), and while it currently only uses Processor and RAM, they are adding Graphics Card based rendering in a future update.

Games: For this I took the example of one of the newer PC games that has come out, and one that I wanted to be able to run at full bore- Civilization 5.

Minimum system requirements are:

  • Intel Core 2 Duo 1.8 GHz
  • 2 GB RAM
  • 256 MB nVidia or AMD Graphics Card

When running it with these specs on a laptop I could play it, but far from maximum settings.  The recommended settings are:

  • Quad Core 1.8 GHZ
  • 4 Gig RAM
  • 512 Graphics Card

Gaming is generally more Graphics Card intensive than productivity software, in part because the architecture of the graphics card is better at drawing faster – for better frame rates, while processors can do more math faster.  So in an enclosed system like a game where it is working with a small set of parameters, Graphics Cards shine.  But when you have many layers of images all affecting each other, the processor takes the lead back.

What am I left with after all this?  To get the best out of all my software, I need a good Processor, RAM, and Graphics Card- I can’t save on one to improve the others.  I also know I use a lot of this software more intensively than most, and I want to be future proof for a bit, so I need to exceed these system specs.  One place where I can save a little money now is in the RAM and Graphics Card.  That is because these are fairly easily upgradeable- with the right mother board you can add RAM to your existing RAM without replacing it.  Also, with the right Motherboard and Graphics Card, you can run in SLI or Crossfire – a method of tethering two Graphics Cards together in your system, and having them act like one, much more powerful card.  The nice thing both both of these is that you can spend, say $300 now on a Graphics Card, and in a year spend $200 on another card, and get nearly the same performance that you would have gotten by spending $700 now.

That being said these are the basic specifications for my new computer:

Processor- Intel Core i7 (Quad or 6 core) with a speed of at least 2.5 GHz and I want the ability to overclock in the future to upgrade slightly.

RAM – 6 Gig (Most motherboards can now handle in the range of 24-36! Talk about future proof!)

Graphics Card – 1 Gig at least, unsure of if I am going to go nVidia or AMD, it depends on the exact card (more later)

Hard Drive – 1TB I use some HUGE files (200 Megs for a single photoshop file), and I don’t want to worry about space for a while.  I may do a solid state boot drive down the road.

Optical Drive – DVD RW for sure, I probably don’t need a BluRay drive, as I could add one once burners get cheaper

Motherboard – Needs to fit my processor, and at least 2x my graphics card

Case – needs to fit everything, have great cooling, and have lots of room for additional Hard Drives, burners, and maybe even water cooling (if I overclock in the future).

Next time I’ll start looking at each individual item, and how I picked which to go with.

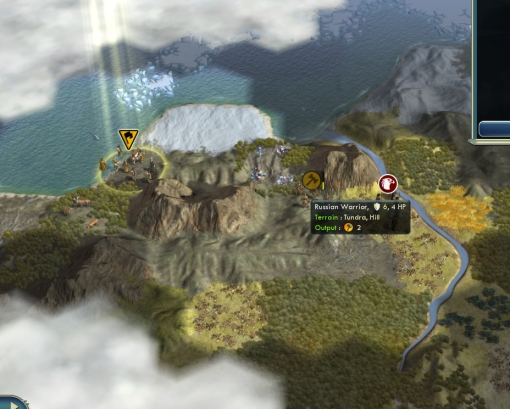
Ignoring the odd artifacting, this is what Civ 5 Looks like with the laptop:

And this is what it looks like with the new build:


An Advanced Course in PC Hardware: What goes into a Computer

3 01 2011

One of my first posts on this blog introduced the different computer components and what roles they play for a Landscape Architect/Designer in general.  Its time to re-hash the topic in a little more detail, and look at not just what components do what different software, but how you pick components, and how you can build your own system from scratch.

There are a few advantages to building your own machine.  For one thing, you know you get exactly what you want.  You can find the exact balance of power, size, and price that you want- you don’t have to work within the parameters of what Dell wants to offer you.  Also, you save a sizable amount of money.  I would say I paid roughly 60% market price for my PC, and I got higher end components then would have been in a pre-assembled system.

The downside is you have to do some leg work to ensure that your machine will work correctly, but if you take the time to do your research, you can get a great machine.  There are many resources around for building your own PC both in terms of research and purchasing.  I did most of my research at tomshardware.  They review individual components, and also have a series of PC builds they do each quarter that they write up that are a GREAT reference for finding the tech you want, for the price you want, in arrangements that will actually boot up.  In terms of purchasing my parts, I mostly relied on New Egg. They have some amazing deals on some great hardware, offer good support options, and ship fast and cheap for when your anxious to get your build going.  I also picked up a few items at Best Buy, as sometimes they will have sales or clearance items that will be tough for even New Egg to beat, and as I work there it was not exactly out of my way.

These are the basic pieces you need to make a fully functional PC:

1. Processor/Heat Sink

2. Graphics Card

3. RAM

4. Hard Drive

5. Motherboard

6. Optical Drive

7. Case

8. Misc. (Card Readers, Sound Cards, second Hard Drives)

9. Power Supply

Each of these items depends somewhat on each other for compatibility reasons, but what you want to do now, and in the future, productivity-wise is going to be the determining factor.  I ranked them in the general order of importance in terms of what you are trying to get out of your system.  For instance- the power supply doesn’t matter to you except that it is of good quality and gives enough power to your system for it to work without fail.  You can’t pick it until you pick everything else, but it doesn’t REALLY effect any of your other choices.

What I’m going to do is first describe what I wanted out of my system. I will then run through each of these components, describing what they do, what effect they have on the programs I wanted to run, and what exact product I ended up getting and why.

Once that is done, I’ll be writing another blog describing the step by step of how I took those components and made the system I am blogging on (while running a 3D model render in the background) right now.

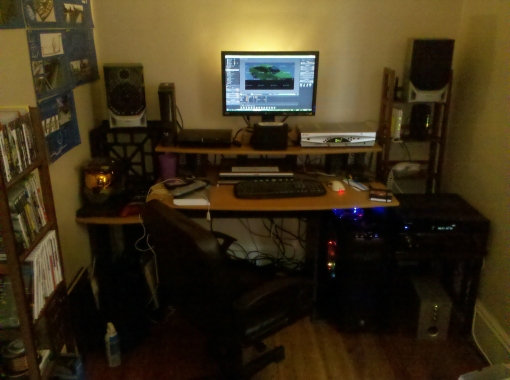
For the time being, I’ll leave you with a photo of the international headquarters of Frank Varro Rendering.